#002 E-Bike (V2,V3,V4)
last updated: 10/1/22
Version 5.5
The 12s 13AH battery pack was disassembled so I could use the cells elsewhere - so I had to shop around for a 13s
(up from 12s) 14 AH battery for the bike.
Analysis of Batteries
As well as having a higher nominal resistance, this battery also proved to have a lower internal resistance.
| Statistic | Old Custom | New Bought |
| Maximum Voltage | 4.2*12 = 50.4V | 4.2*13 = 54.6V |
| Nominal Voltage | 3.7*12 = 44.4V | 3.7*13 = 48.1V |
| Stated Maximum Current | 5C or 68A | 75A |
| Measured Internal Resistance | 0.19 Ohms | 0.12 Ohms |
| Voltage at 60A | 44.4 - 0.19*60 = 33V | 48.1 - 0.12*60 = 40.9V |
| Power at 60A | 33*60 = 1980W | 40.9*60 = 2454W |
| Power at 100A | 2540W @ 25V | 3610W @ 36V |
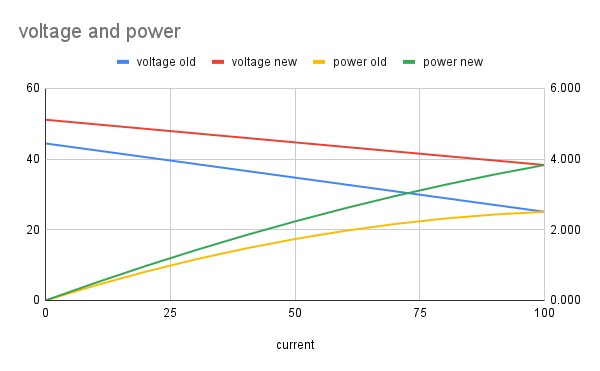
Calculated with real data of voltage and current.
The bike still suffers from what I will call motor saturation - the point where the controller is powering each
phase with 100% of the voltage but back EMF and winding resistance limits the current and power. To solve this
problem I can increase the voltage which would require a new battery and controller or I could increase the KV
of the motor.
If I double the KV of the motor, I get different performance statistics. Real world physics aside, a doubling in
KV results in a doubling of RPM and a halving of torque at a given voltage and current.
However, a buck converter (aka my ESC) is a great way to trade voltage for current. MY ESC claims to output 200A
per phase, so lets say 100A per phase, which is still double my phase current for the bike as it is. So, I would
have the same torque but have higher RPMs... and be able to suck more power from the battery! Hopefully this is
next change.
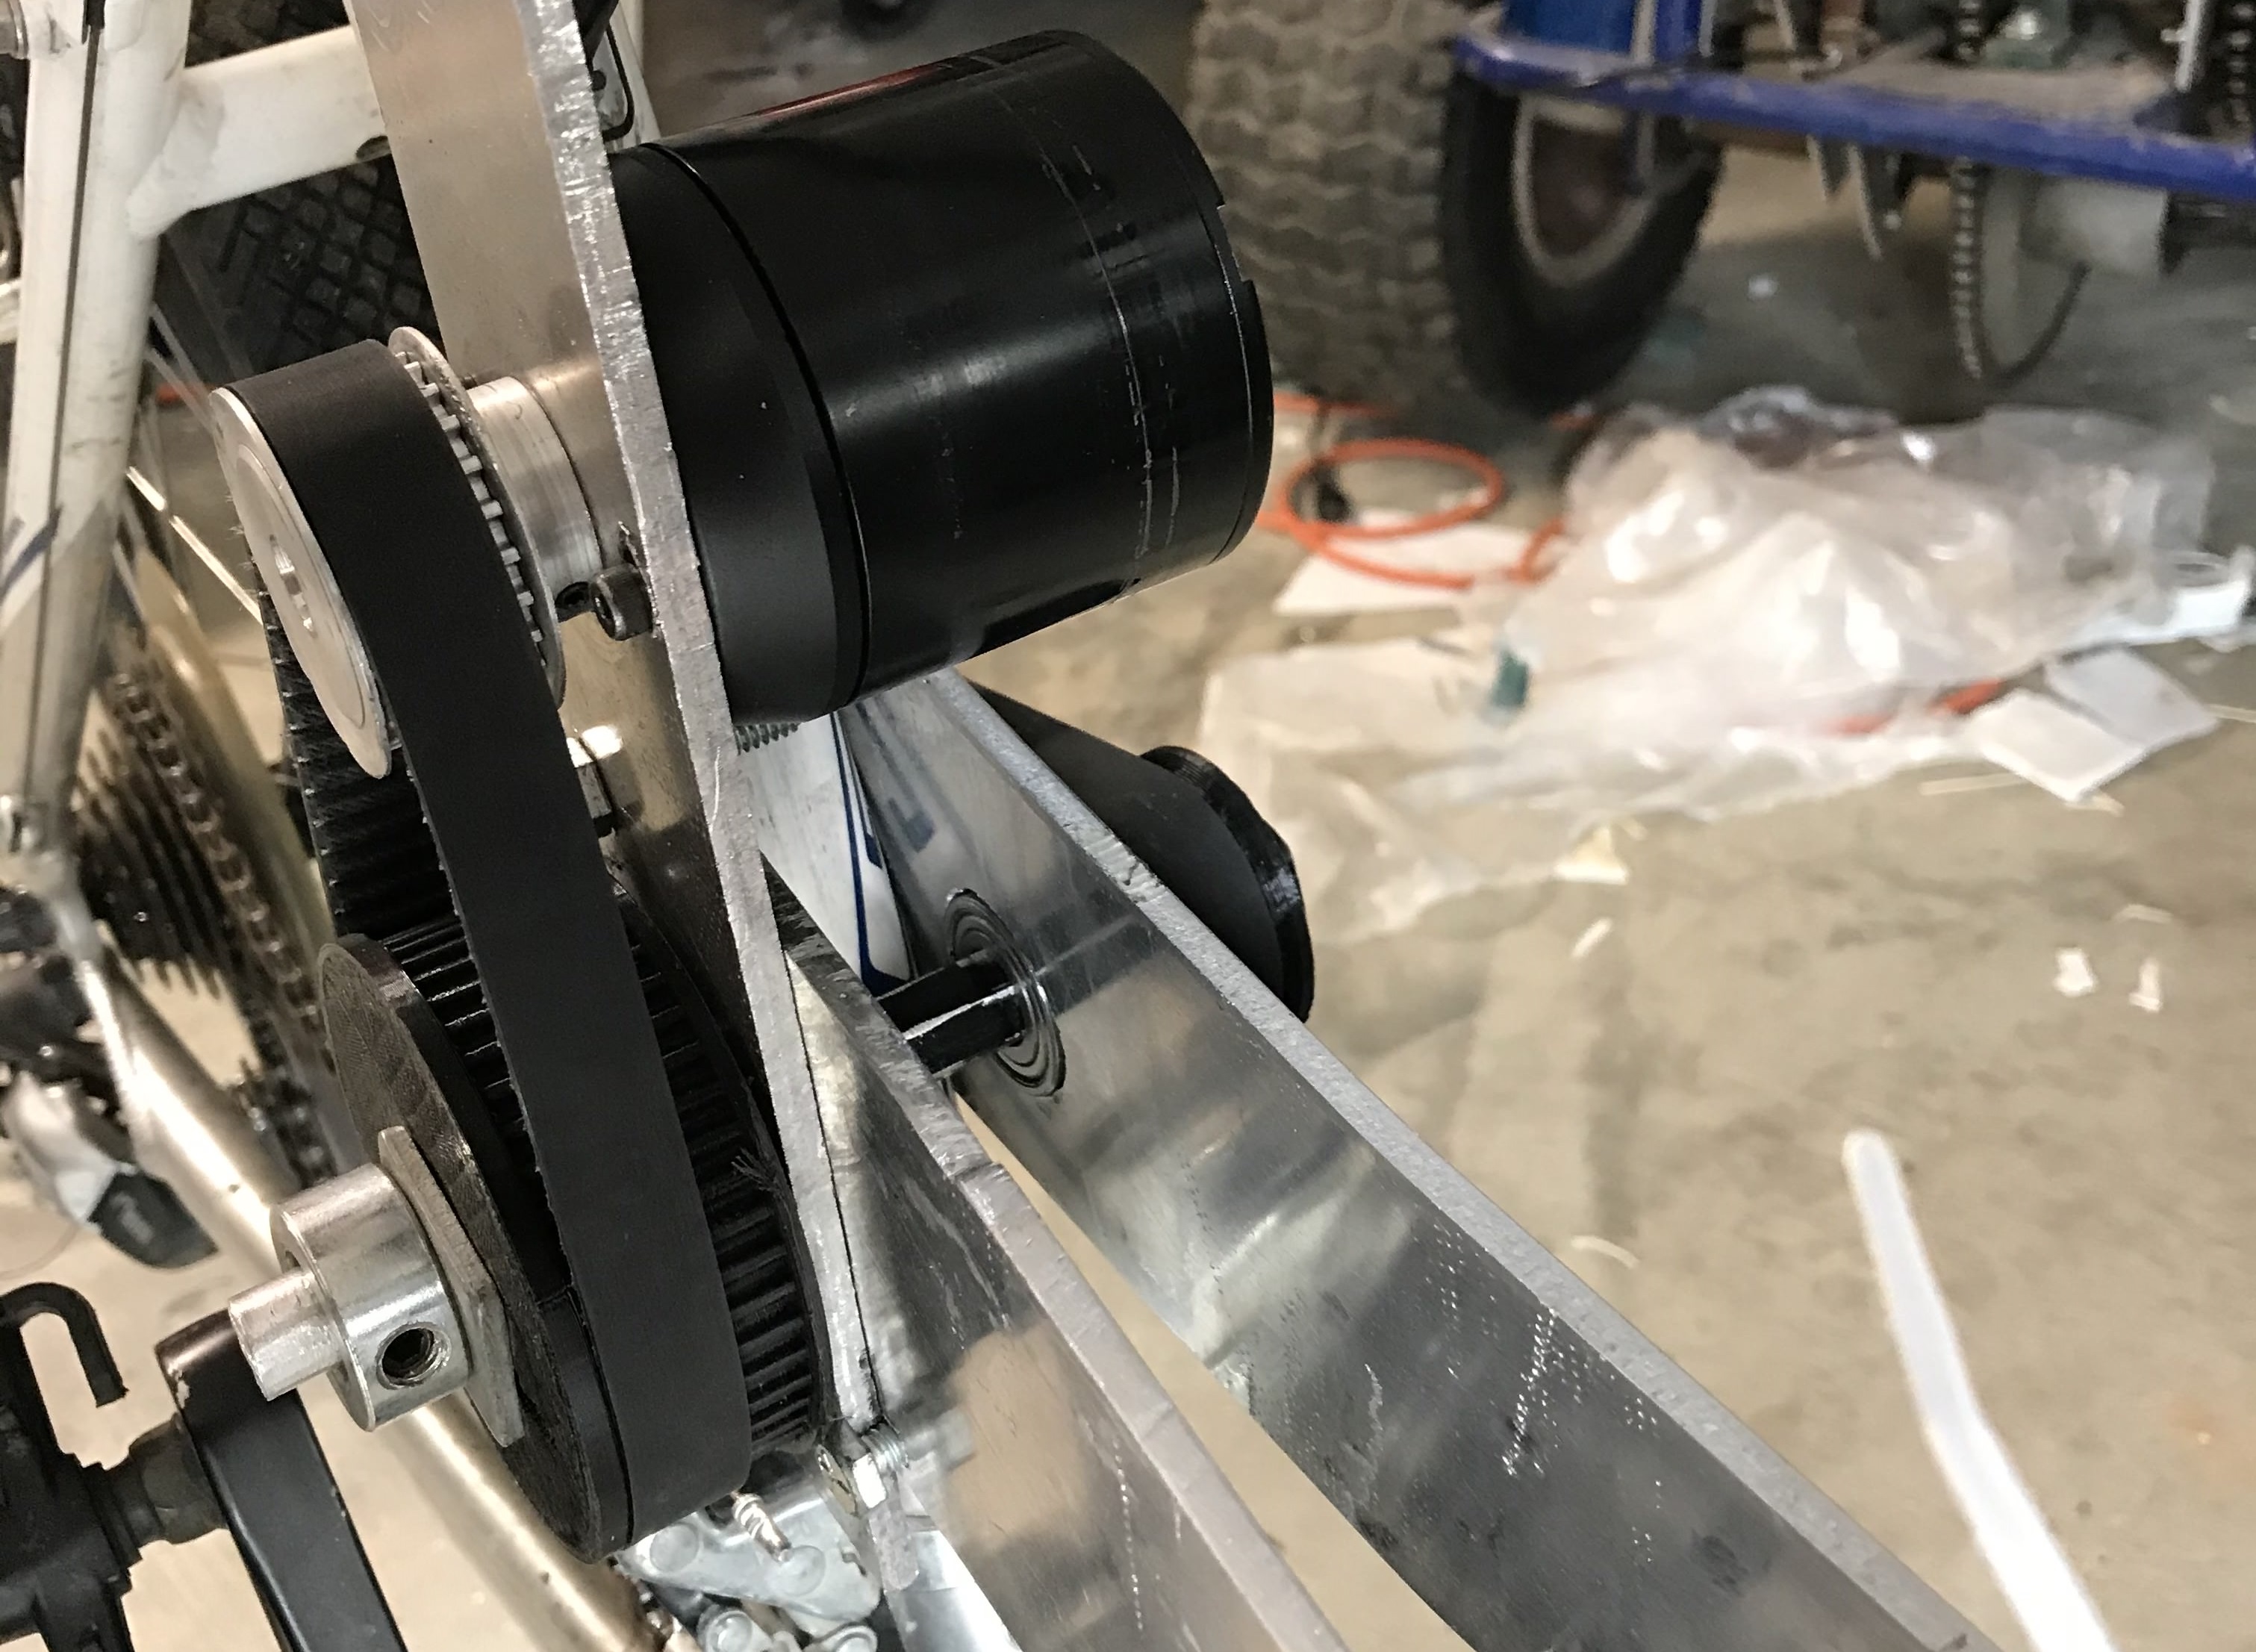
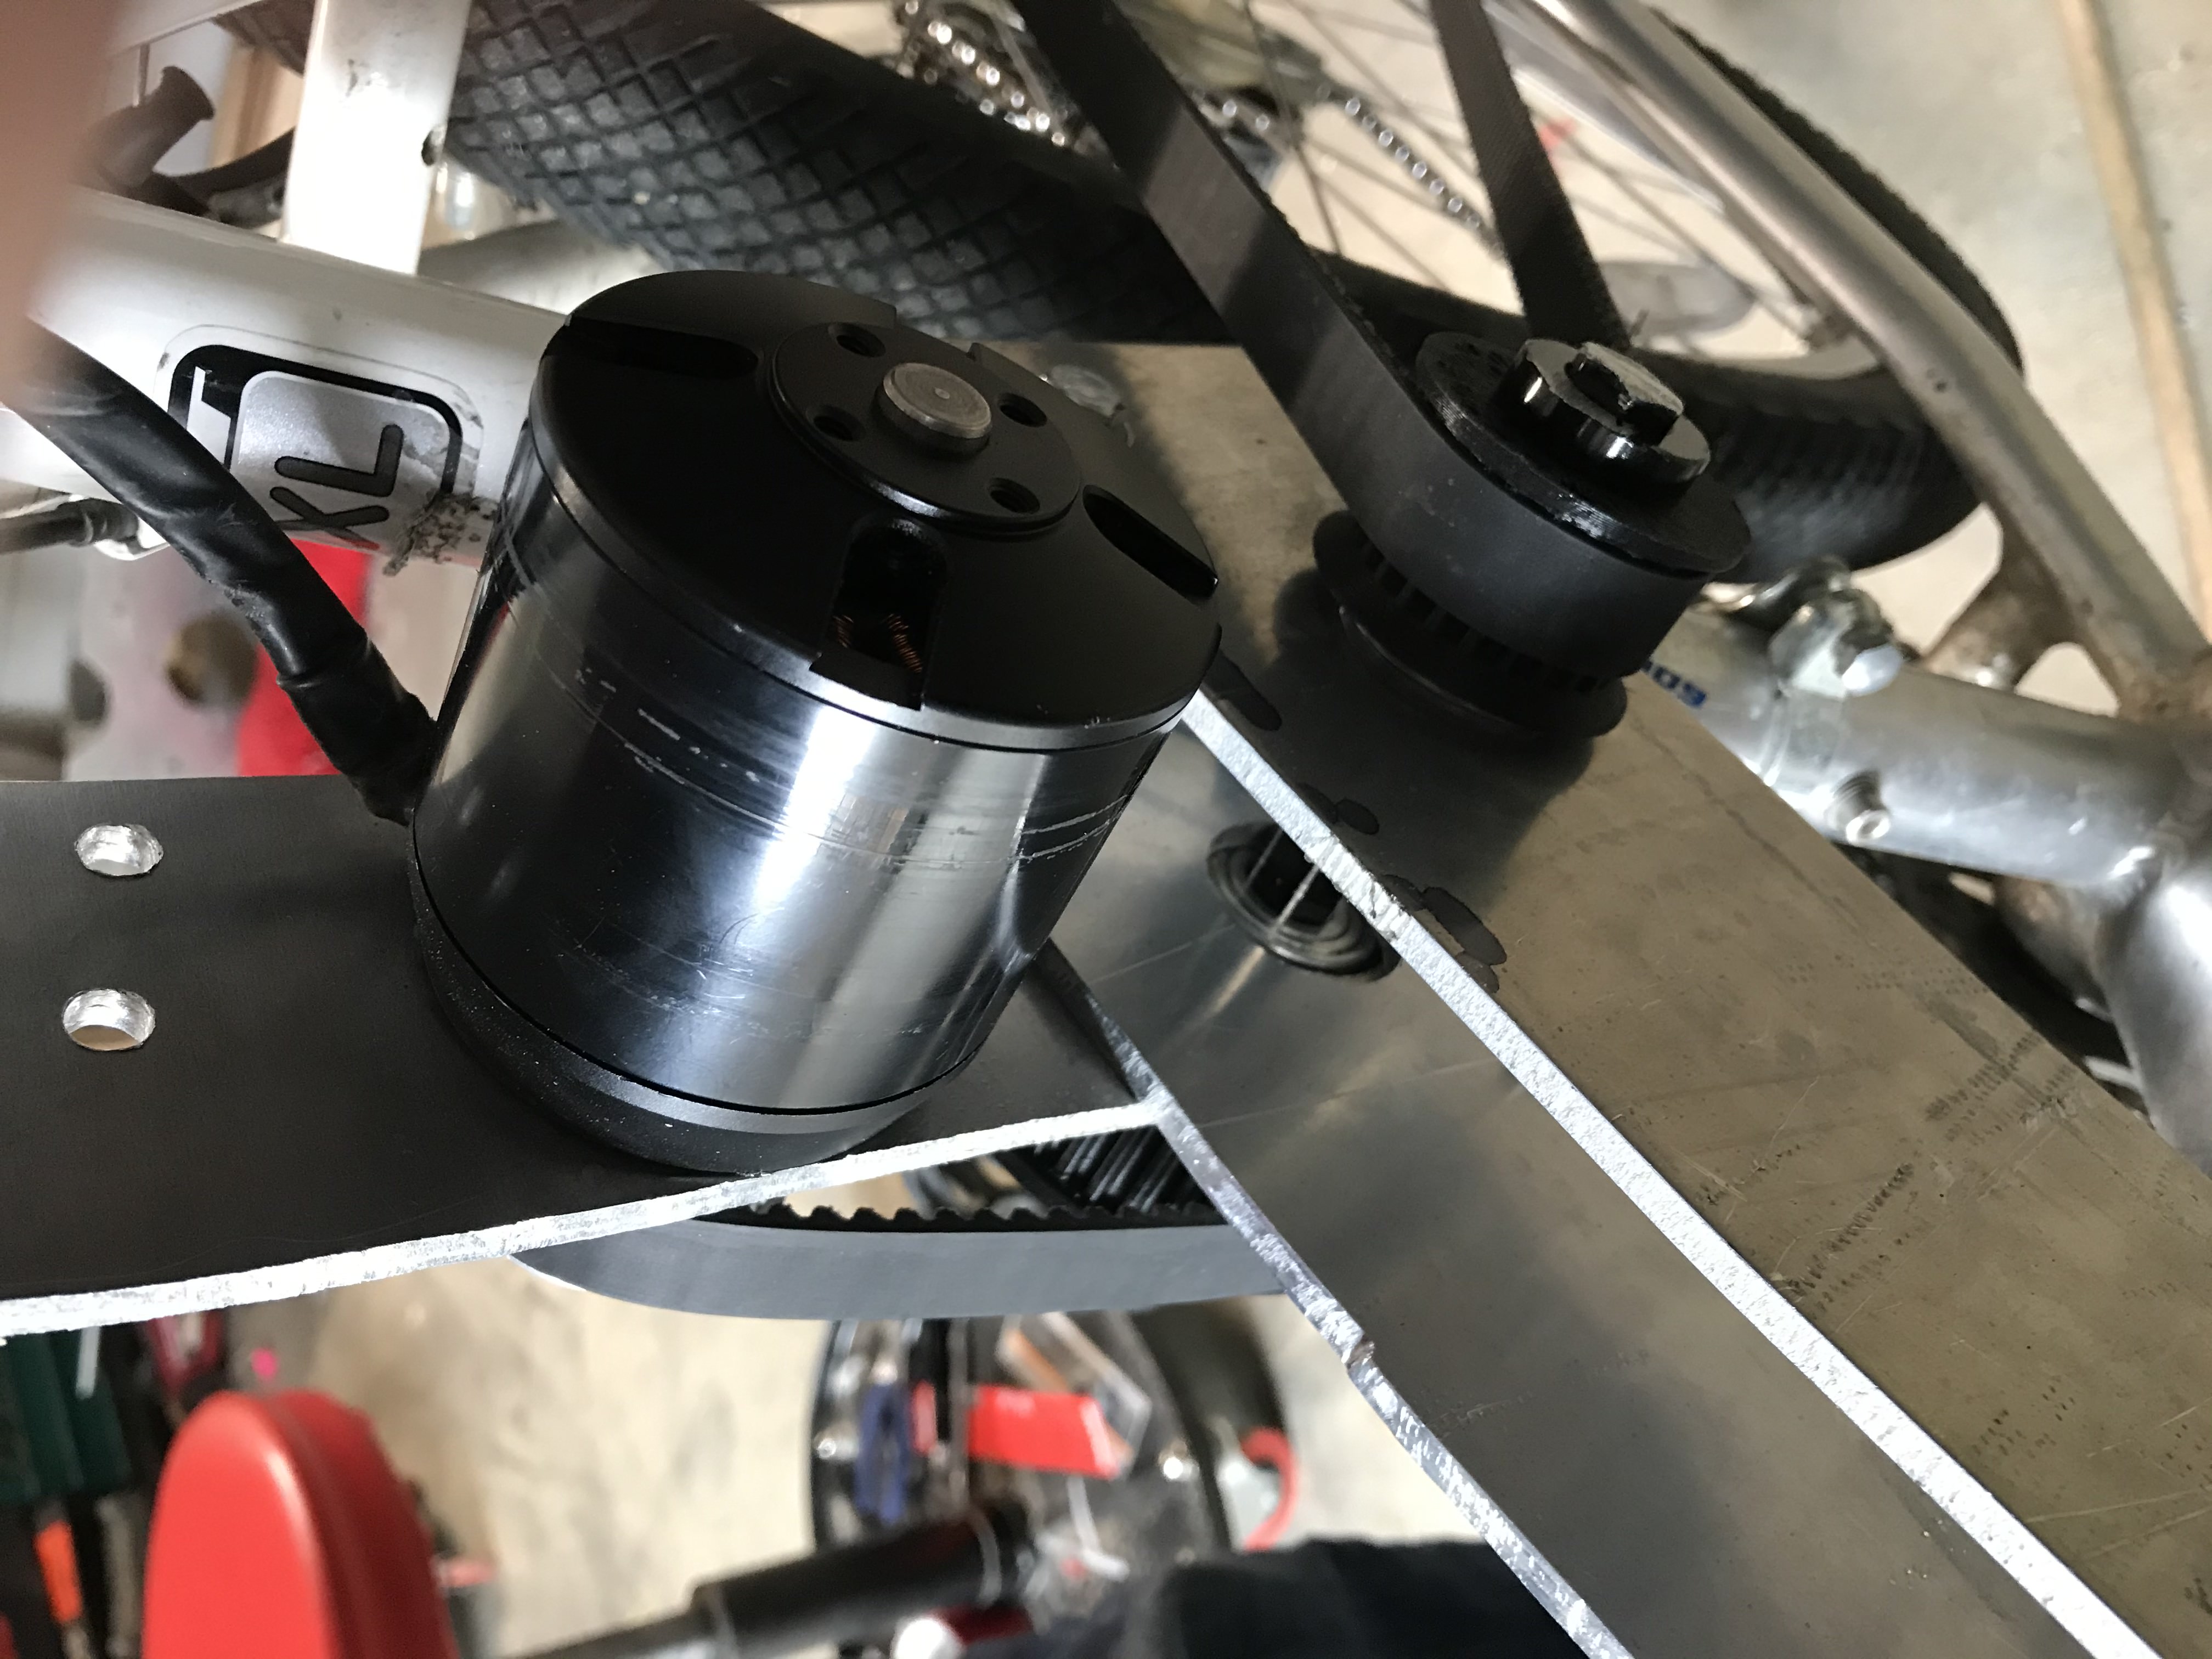
Version 5
The last issue with the bike was that the back belt consistently slipped, and the noise from the plastic
pulleys was quite obnoxious. The solution was to go from a double reduction to a single reduction. Also, the
metal pulley on the motor shaft would be the only other pulley besides the wheel pulley. The belt would now
be tightened by rotating the metal bracket that the motor is attached to around the point where it is
attached to the seat post. The lost 2:1 reduction was partially accounted for with a reduction in KV on a new
BLDC
motor, although speed did go down.
I did all those things in about two hours. Here's the result.
I have been riding the bike daily for the entirety of my sophomore year. It is powerful,
has good range and is fun to ride. It saves me a 20 minute walk to class and back three times a day
easily... I had one issue with the BMS lead wires disconnecting from one of the cells which led to that cell
not being balanced, but luckily it was savable.
Analysis
Around February 2023, I installed a cheap power meter into the handlebars to measure the voltage and current
of the bike. I noticed that the bike did not draw much current above 20 mph. Utilizing the VESC's logging
ability, I recoreded a bunch of fun datapoints and got to analysis.
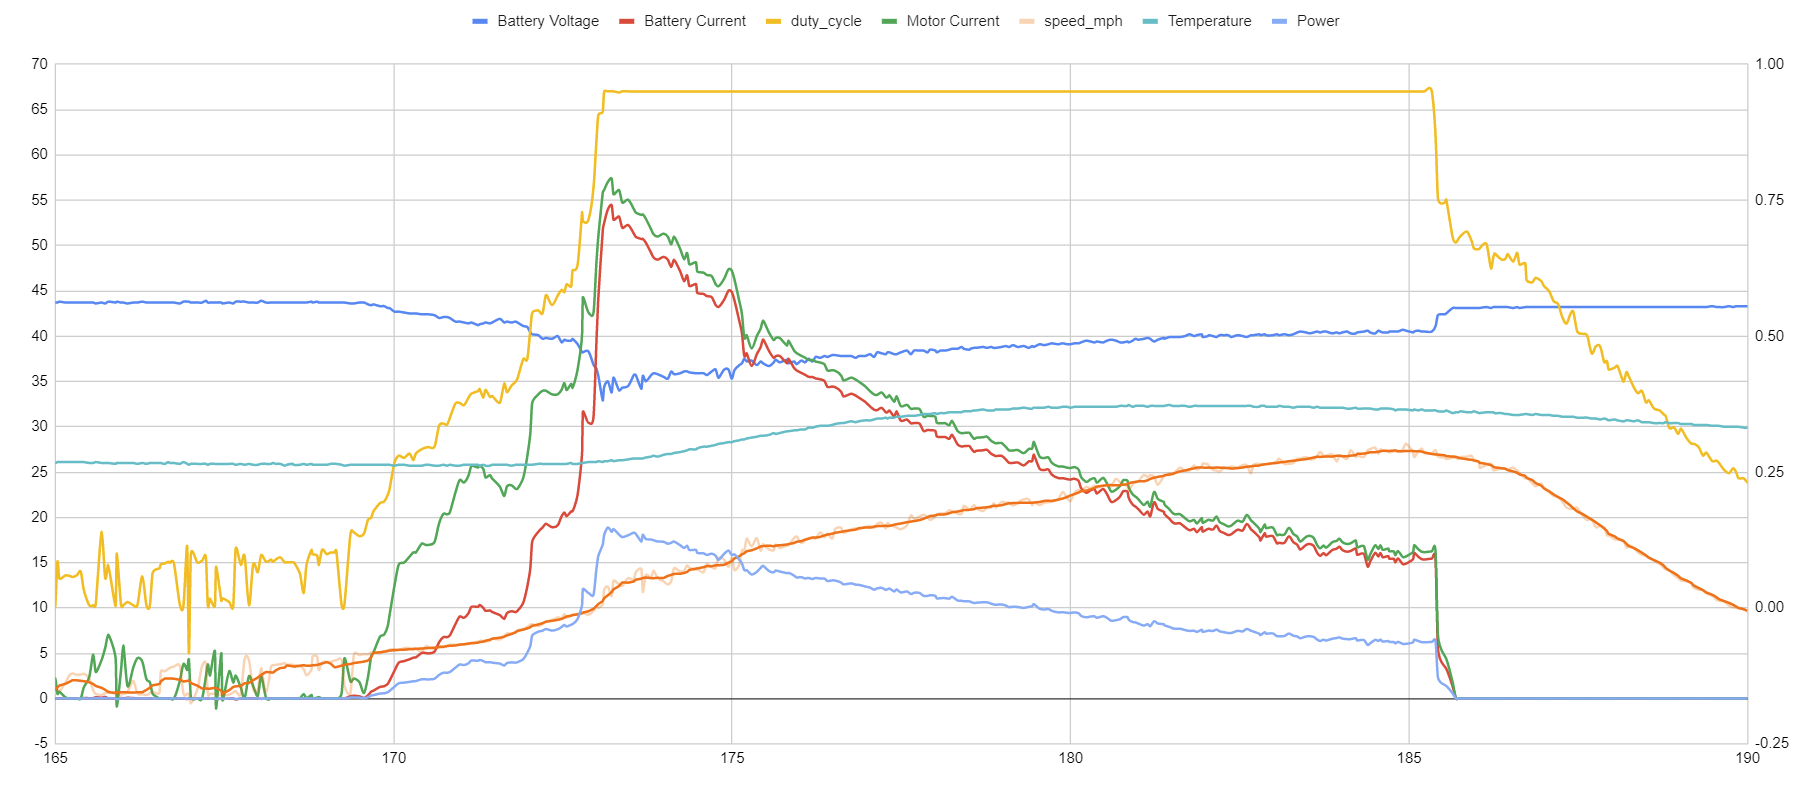
A typical acceleration run. Power is the light blue line and is in 100s of watts, so divide by 10 to get KW.
From what I can tell, the motor for the V5 version was not selected well. At 100% duty cycle and 20 mph, the
motor already only draws 30 amps. 30 amps at 44 volts is only 1.3kW... not enough!
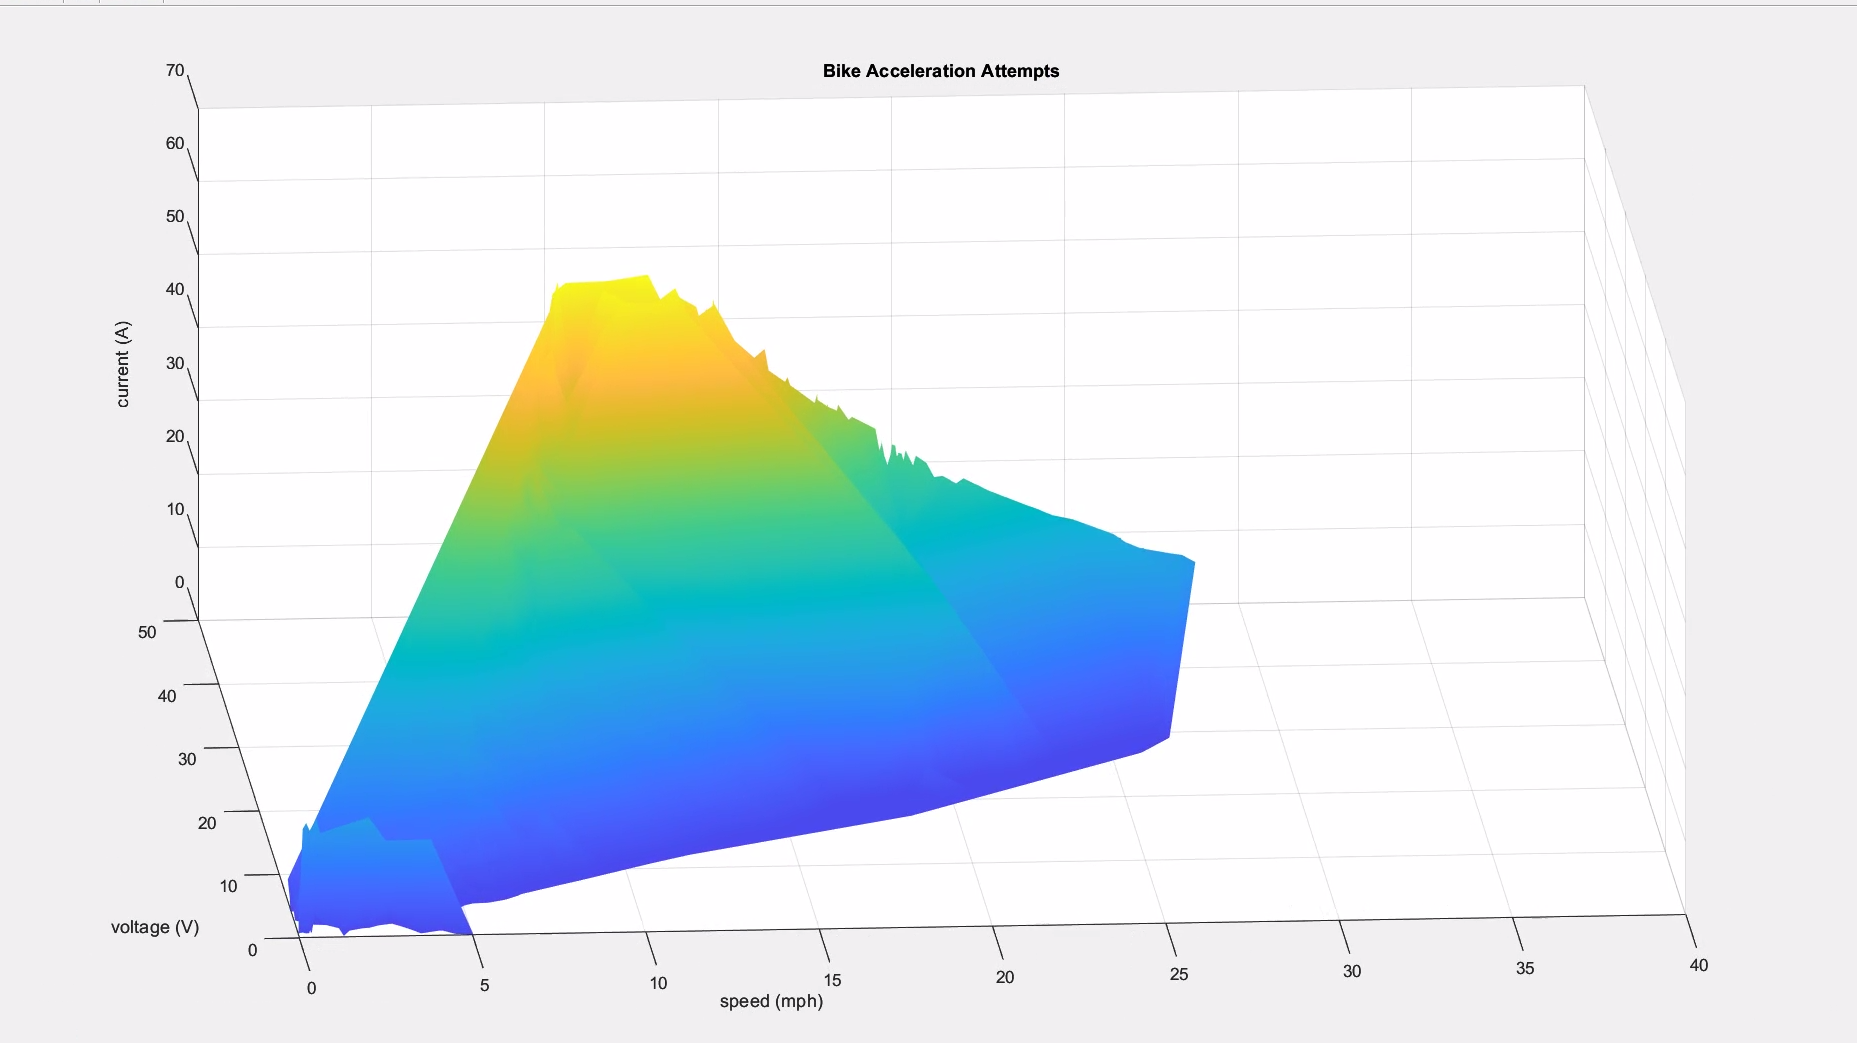
A 3D plot of motor current as a function of motor voltage and RPM
I found this super
helpful article on motor selection from Benjamin Vedder, the creator of VESCs. It points out that for
motors of equivalent size changing KV does not effect waste heat per unit of torque. My goal is higher power
and higher speed with the same belt geometry. If I were to double the motor KV, I could operate at my same
performance with double my current at half my voltage. The reality of speed controllers means that no
additional load is required from battery. (200% amps at 50% voltage is 100% power). But, I can use 100% of
my voltage, and keep higher currents during higher RPMs. This led to Version 6.
Version 4
The last upgrade upgraded the controller to be capable of up to 50 volts. The last battery was a 7s lipo,
cobbled out of a 6s with one cell dead and a 2s. It had no BMS and had to be charged with a drone battery
charger. It was 8000 mAh, and needed to be charged to go more than my usual ride to classes.
The new battery is much better. I fabricated it myself out of the same yellow cells (QB26800) I used in my
car. I can
go three times as far and get to speeds that are completely unreasonable for a bike. It has a BMS and is
lithium ion.
| Old | New |
| Voltage | 7s (25.9V) | 12s (44.4V) |
| Capacity | 8 Ah | 13.6 Ah |
| Burst Current | 240 A | 68 A |
| Energy | 207 Wh | 603 Wh |
| Top Speed | 22 mph | 35 mph |
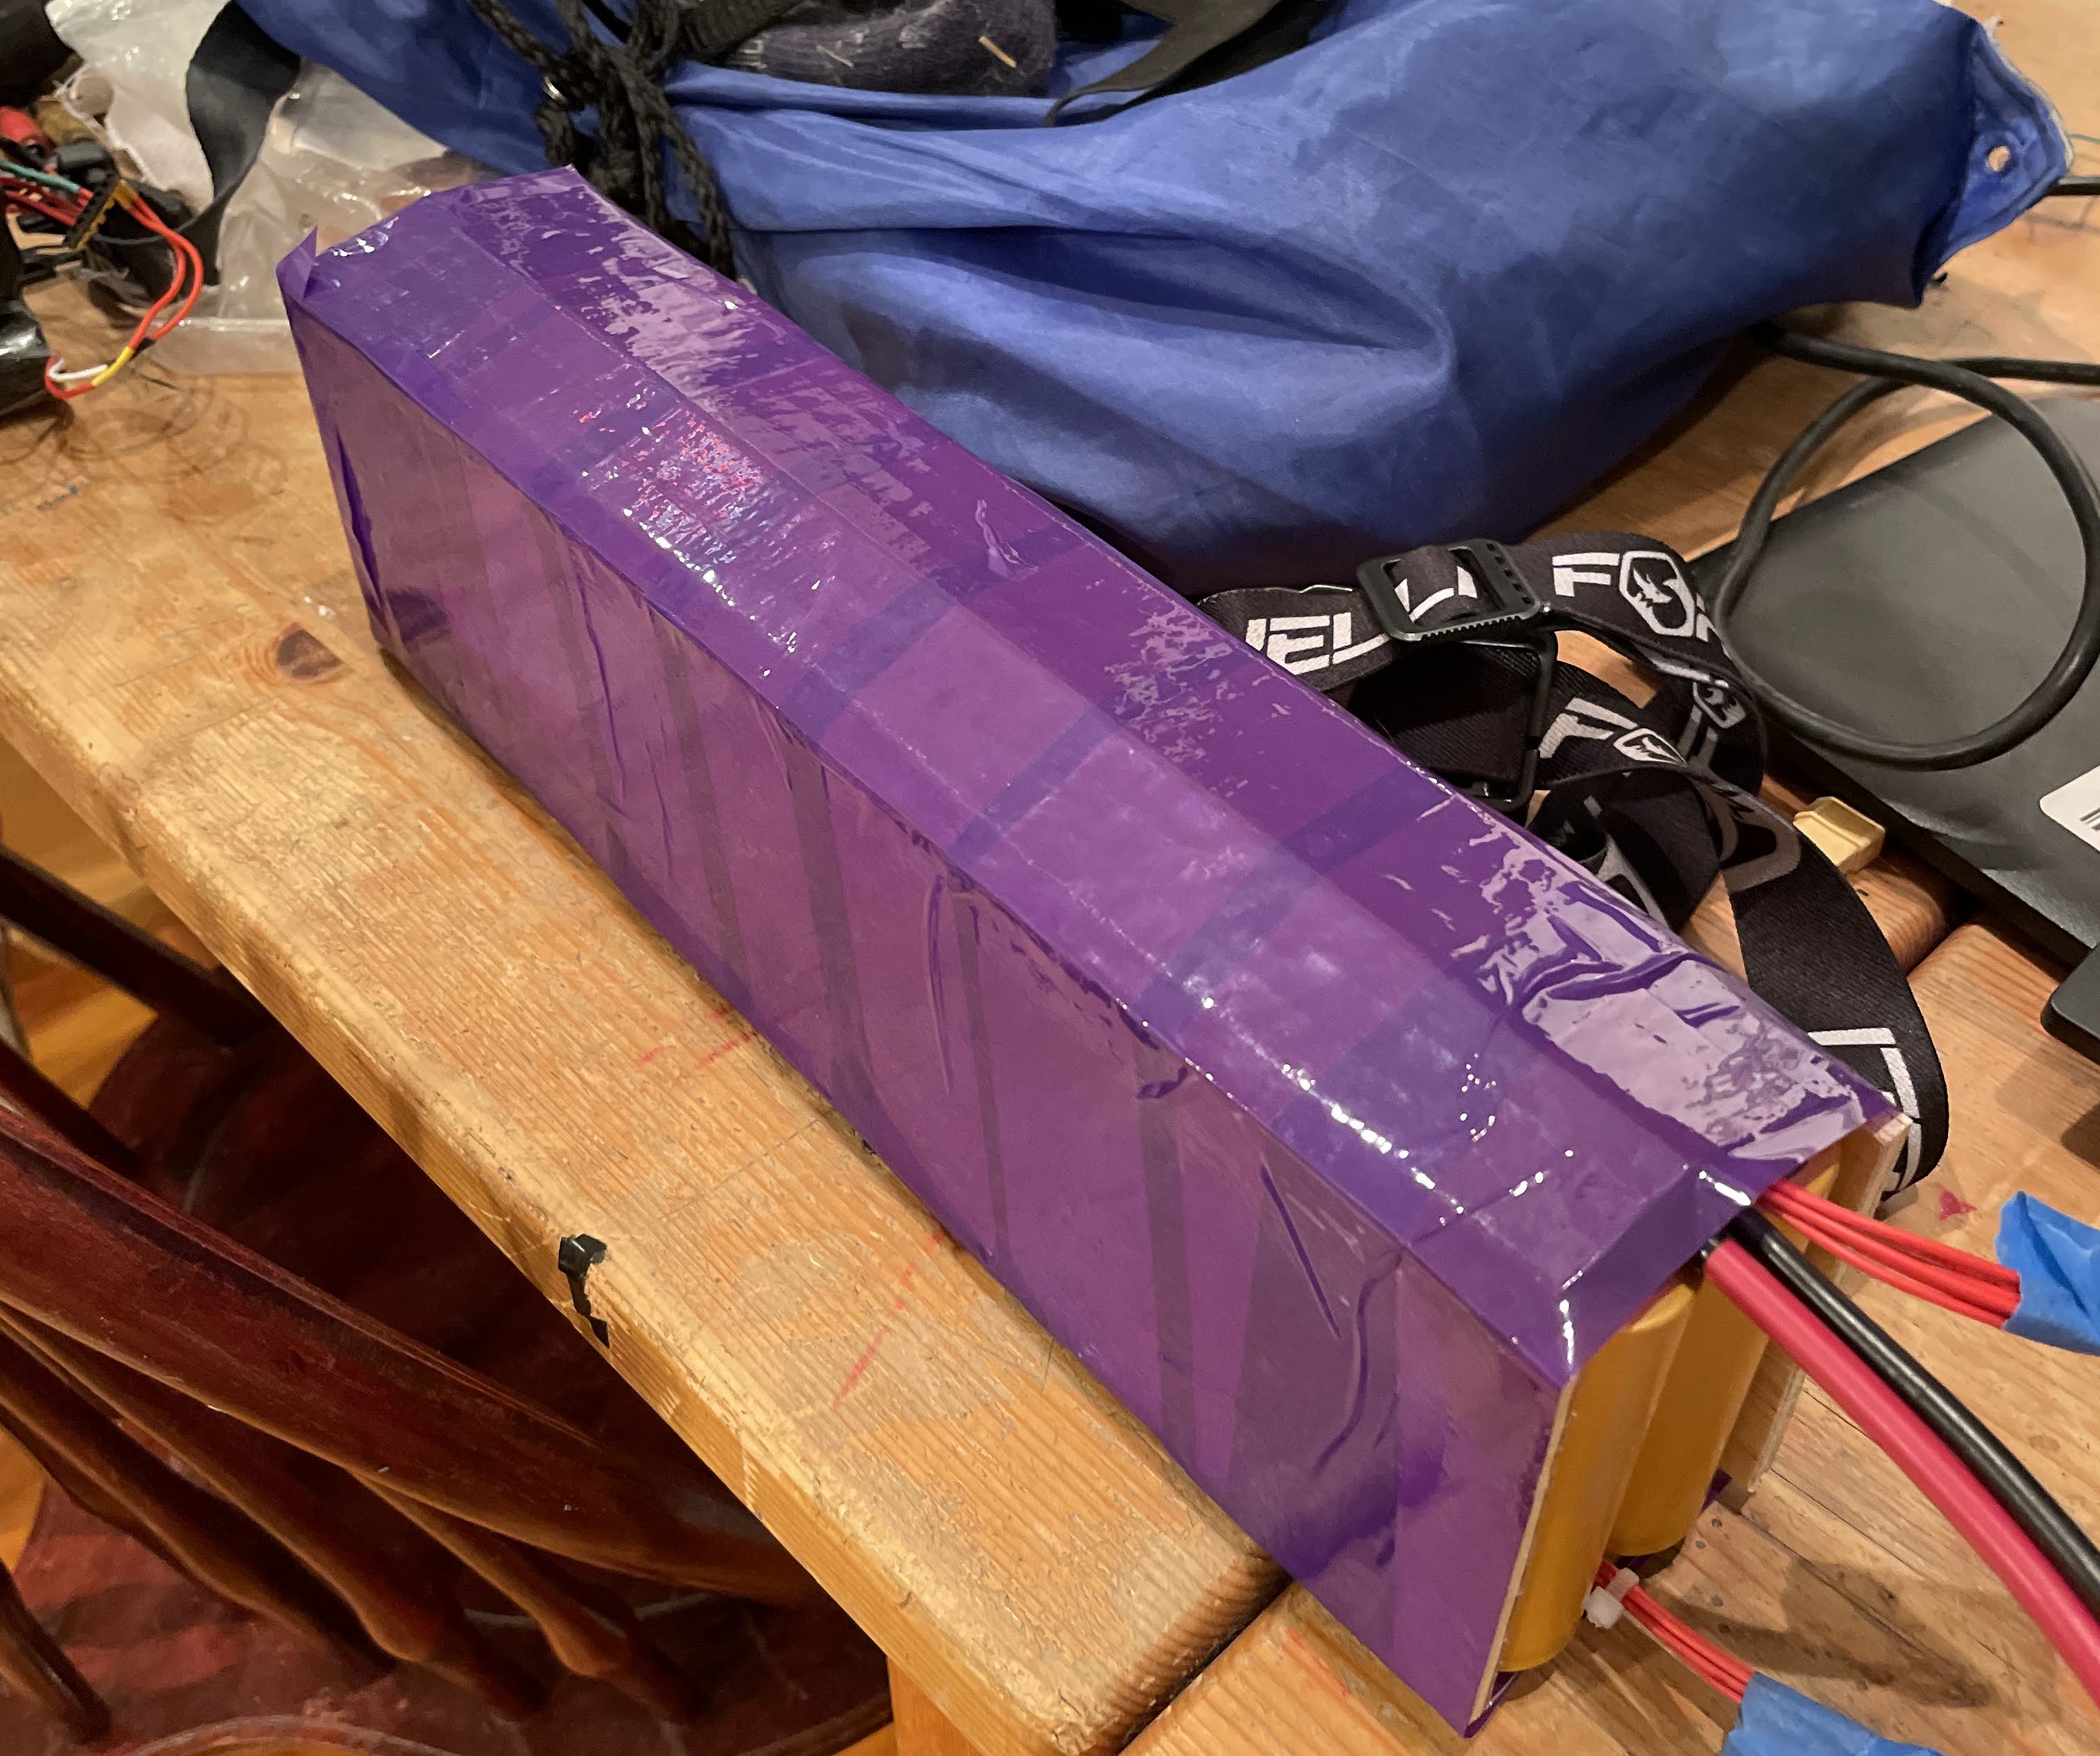
The battery without the BMS on the front. It is 'waterproofed' with purple packing
tape. It has 1/4 inch plywood on the sides and carboard on bottom and top.
Version 3
The third round of revisions stems from about 2 months of riding my bike around my university.
- Upgraded from $40 cheap no-brand ESC(7s, 125 Rated Motor Amps) to 90 dollar VESC6.7 Single (12s, 200
Burst Motor Amps).
- Switched the zip--ties holding the rear pulley to the spokes out with U-Bolts and nuts.
- Switched the 3/16 inch aluminum for the motor bracket out for 5/16th aluminium of a higher grade to
reduce bending.
- Removed the current sensor, screen, and speed sensor for greater weather reliability.
I hope to also upgrade the battery to a 10s or 11s for lower resistive losses and increased range.
Version 2
The premise of V2 rests on one major issues with V1: It just wasn't strong enough. For the smaller upper timing
belt, the forces were all conveyed into the single bracket that both the motor and hex bearing were bolted into.
The larger belt, however, had a single aluminum plate that only balanced out forces from one axis on one side of
the axle. Version two is based on the idea that two brackets, both secured in two places on the E-Bike, provides
enough rigid force in order to be able to turn the motor up to full power, compared to the time-based spool-up I
had previously.
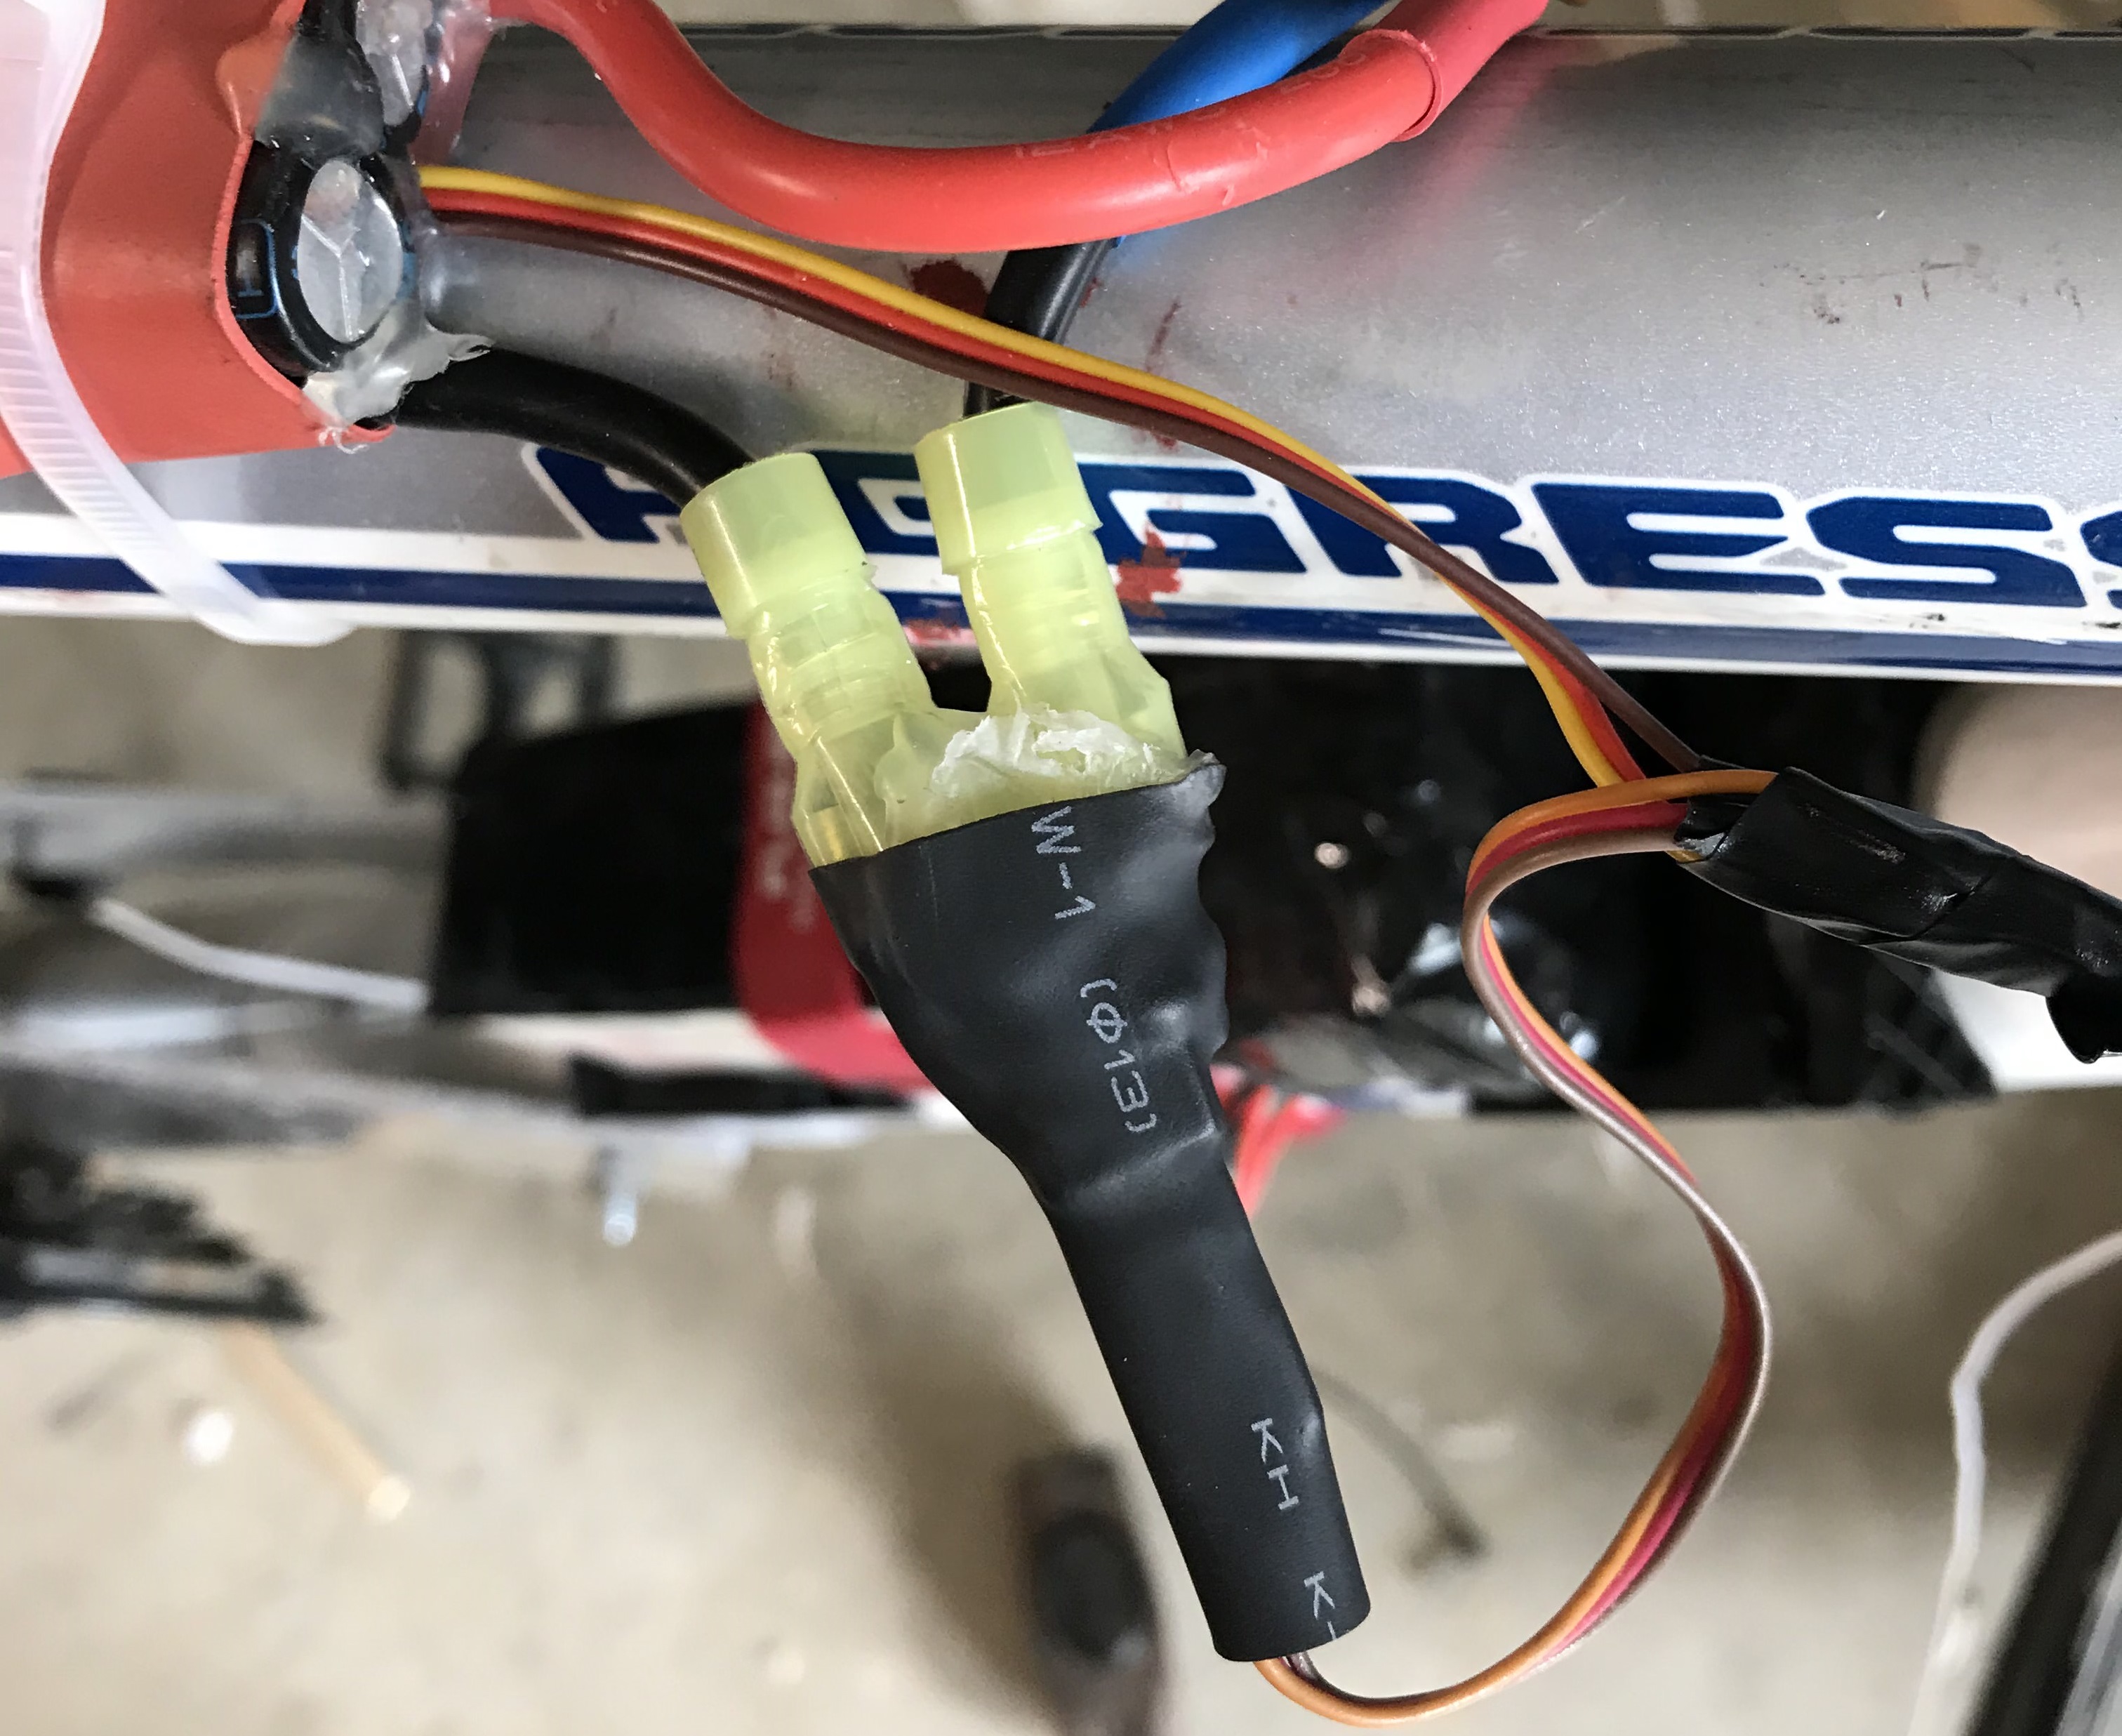
Secondly, V2 comes with a very important part: a Hall Effect current sensor. This will allow me to a)
see how
well my speed controller is living up to its promised 125 amps (motor current), and b) display remaining
battery. I also
can
calculate fun realtime things such as average energy use, predicted range, and all sorts of stuff. This
image here shows the sensor after I connected the leads and wrapped the entire sensor in shrink wrap, so
its a little difficult to see.
Construction was fairly standard for aluminum: I shaped the parts with a sawzall
and a large adjustable wrench. I put it all together, and took it out for a test ride. Surprisingly,
nothing broke. It was in operation for several spring months. The cheap speed controller finally gave
out after I attempted to go up a long hill at full speed on a hot day. As of now, I just need to put
down 100 dollars for higher-quality speed controller.